
The side control is another basic position in BJJ that you’ll see most fights revolve around.
The fact that side control variations give you 2 points in NAGA (No-Gi) and 3 points in RMBJJF competitions is enough to highlight its importance.
If not that, one should consider this position as the surest way to get into the knee on belly, which rewards 2 points in IBJJF, SJJIF and other competitions as well.
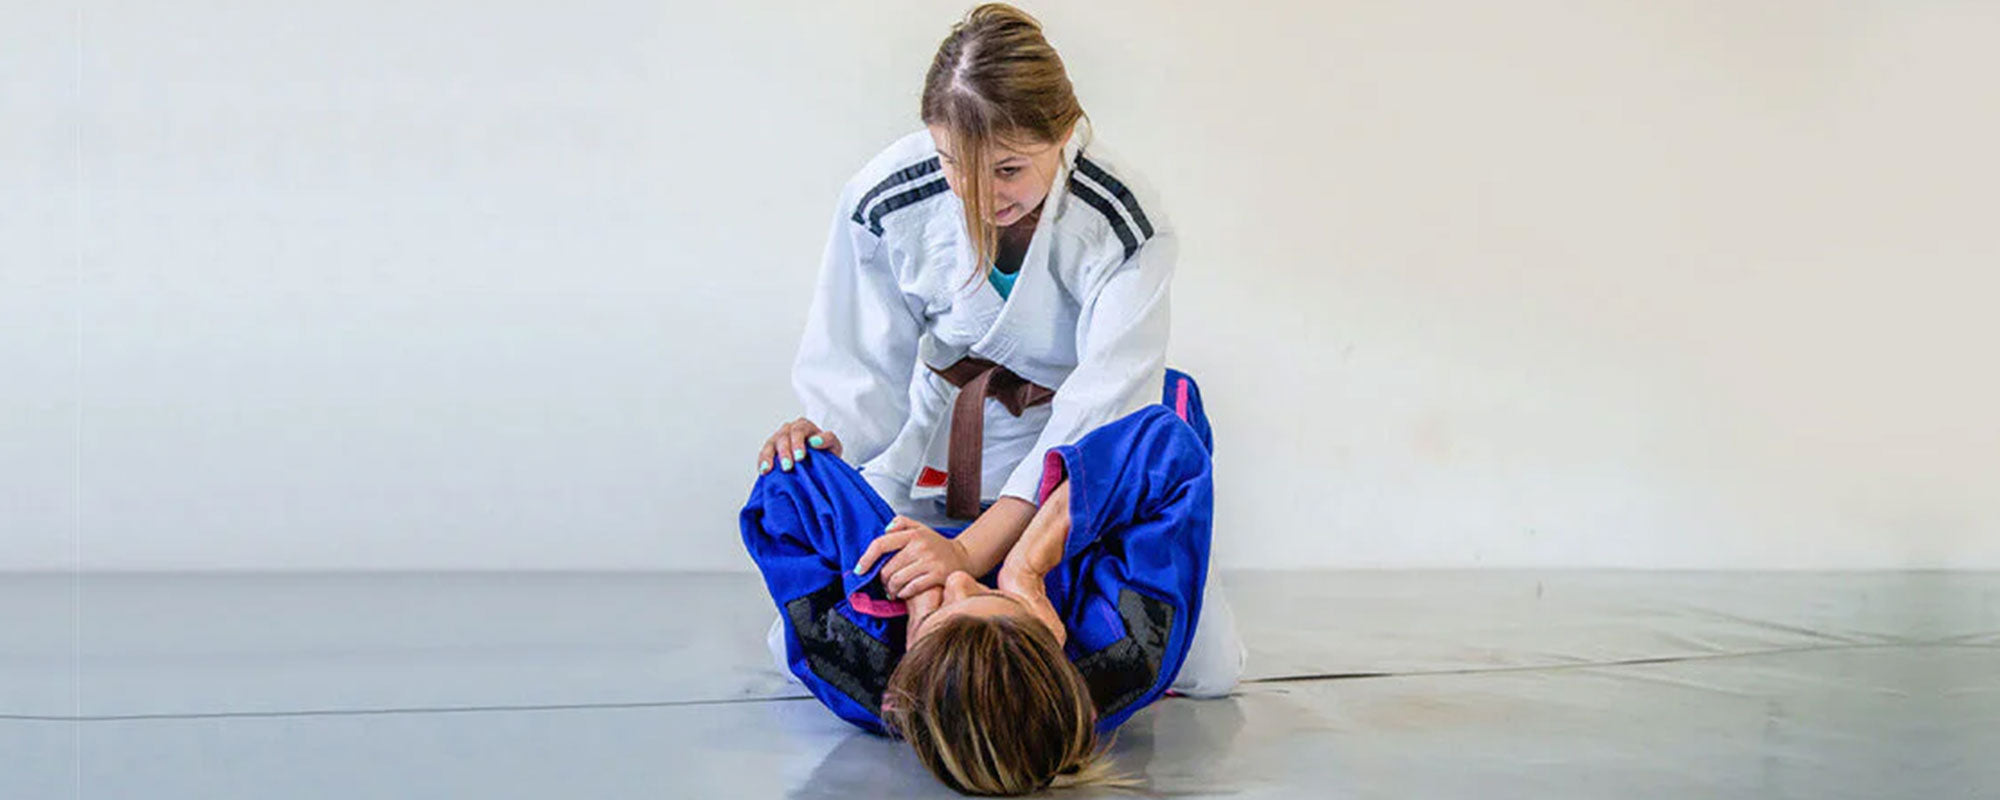
To get into the side control position, the idea is to pin your opponent down on the mat and use your upper body to exert pressure.
This means you’re going to be perpendicular to your opponent’s body and arms can be either over them or going around their neck.
Its importance can be judged from the fact that you need to get into the side control before you can attempt to take the mount position in BJJ. (In most cases, anyway)
Here are a couple of variations to the side control position:
- Classic Side Control
- Kesa Gatame (With Scarf Holding)
- Reverse Kesa Gatame
- North South
In this post, we will be looking at all the side control variations to understand how we can retain this position once we get it.
We’ll also look at some attacks we can launch from the side control and the possible ways to escape side control should we be caught in it.
Let’s take a look at the various types of side control variations:
Classic Side Control
The classic side control position is the traditional cross-face side control that we all learn about.
You have your opponent on their back and you’re hugging their body tightly by having one arm under their shoulder and the other touching their bicep from under the elbow.
Your knees should be on the ground and far enough for your opponent to not be able to pin them.
Kesa Gatame
Identified by some as a kill system, the Kesa Gatame is a deadly position that most notably signifies the ending of a match.
However, it’s not always a victory for the person applying the Kesa Gatame because there are some nasty counters to the techniques in this judo position that can turn the tables in a blink of an eye.
In Kesa Gatame, you are facing your opponent while putting your weight on your opponent’s stomach.
In BJJ, we usually go for the Kuzure Kesa Gatame:
You have one of their arms (left) trapped with an underhook (your right hand) and you hold their other arm (right) with your other hand (left).
Meanwhile, your legs are opened and wide to make a good base. Your right leg should be rotated a little to the right and should be balanced on your toes.
Your right knee should be right next to your opponent’s head.
Whereas, your left foot should be down and behind you, far from your opponent. Your left knee will bend a little towards your right leg to allow for flexibility.
Whereas, when we hold our opponent’s head instead of trapping their arm, this becomes the Makura Kesa Gatame or Scarf Holding.

Reverse (Ushiro) Kesa Gatame
Reverse the direction you’re facing but pin your opponent in the same way, i.e. by trapping their arm (right) with yours and having their head locked in with your other arm (left).
The Reverse Kesa Gatame is a side control variation that allows you to pull off effective and deadly submissions and get into the simple or high mount.
However, there are reversals like the simple hip bridge escape that allows your opponent to take your back as well.
All they have to do is push you down towards their knees and nullify your mounting attempt.
Then, they need a grip on your Gi or your shoulder in order to disable your attempts at turning.
After that, they’ll shrimp back, bridge into you, and get their right knee out from beneath and get you locked in their rear mount seat belt.
North South
The North South Position is a side control variation, though instead of being on the side, you’re completely opposite to your opponent’s body.
With your hands on their belt or hips, your knees are on the left and right of your opponent’s head, entrapping them in between.
Your head should be applying downward pressure in the middle of your opponent’s chest.
Knee on Belly
Knee on belly is a position that itself is enough to tap many white belts.
This position is so dominant, it grants 2 points in almost all competitions to any person who can assume and keep it for 3 seconds.
As the name shows, this side control variation requires you to pin your opponent down while having a knee on their belly, causing difficulty in breathing and restricting their mobility.
How to Retain and Defend the Side Control Position?
Most people get the side control position once they pass the guard, get a sweep or takedown, escape a submission hold, etc.
Since there’s no one way to get into the side control, it depends upon individual situations how you get into the position.
However, once you get to it, here’s a couple of tricks you should know in order to maintain the position for 3 seconds or more and score points while going for knee on belly or submissions:
Keeping Knees and Arms Close
The fundamental principle of side control is to immobilize your opponent. You can’t risk losing the side control if you allow your opponent’s limbs to roam free.
To block their escape attempts, you need to make sure you do one of the following:
- Have one or both of your knees against your opponent, with one knee right against their waistline or the hip (the connecting point of the leg with the waist)
- Have both your legs extended behind you while exerting intense pressure from your chest onto your opponent.
Regardless of what you choose to do, make sure that you have your opponent’s arm trapped by not allowing their elbow to go to the mat.
This will disable their ability to shrimp out and create space to get out.

Immobilizing Through Pressure
Keep your opponent’s hips trapped at all times by putting pressure on them.
By just having your knee against your opponent’s waist, you can easily subdue any attempts they’ll make with their knees to try and get their legs up.
This will work in a similar fashion if your opponent tries the bridging escape as described below.
You’ll need to increase the pressure that you put on your opponent in order to get them to expose their limbs and neck for armbars, triangles and chokes.
The above is an example of how you should pin your opponent.
As you extend one leg behind and get on your toes, you will be surfing your opponent.
Moreover, it’s important to understand that you will not be pushing your weight on your opponent vertically.
You’ll be sliding into their chest horizontally by applying force from your toes.
By pushing your leg or your knee towards your opponent’s hips, you’re neutralizing any threats posed by their legs and knees while making it harder for them to breathe.
From here on, you can get to the knee on belly, the simple mount or even Kesa Gatame or other variations as described below.
If your opponent manages to get an underhook, go towards the head after gripping your opponent’s belt (Gi) or hook your hand beneath the armpit (no-gi) with one hand.
Your other hand should be gripping your opponent’s right knee to ensure they don’t come on top of you.
Whether it’s from here or from the simple side control position, you can choose to engage in the Kesa Gatame.
This position will involve you rotating your hips so that you’re facing right on your opponent’s body.
For those who don’t know, the Kesa Gatame is a whole kill system and not just a move or a simple position.
What this means is that there are tons of submissions and moves that you can do from this position, enough for it to be one of the best positions one can attain in Judo.
List of Attacks from Side Control:
As the top athlete in side control, you have a lot of control over your opponent’s movements and body.
Eventually, you’ll get more than a few openings to target anything you like. Most notably, people go for hand and arm locks such as kimuras, americanas, etc.
However, there are also choke options available such as the lapel choke.
Kimura
The kimura is easy from the side control if you know how to get the grip.
You can get the side mount position and instead of getting your hand under your opponent’s neck, get it under their right elbow.
Meanwhile, get your right leg beneath your opponent’s left elbow and get it up to their face.
You can’t have this arm of theirs creating problems for you and so, you must isolate it.
Once that is done, you can go for the kimura grip on their right hand by baiting them to get a frame under your neck.
Just raise your hand to your face and they’ll think you’re trying to cover your neck and as soon as they get it close, grab it for the kimura grip and get an underhook.
Lapel Choke
The lapel choke requires a bit of setting up but is one of the deadliest finishers in BJJ.
When you’re getting inside control and applying pressure on your opponent (cross-faced), you also use this time to grab your own lapel and get it in your right hand.
Make sure that you’re on your knees in order to make space between your chest and your opponent and get your gi out.
Also, it’s best that your opponent doesn’t see you, otherwise, they’ll concentrate on escaping the specific submission.
Apart from that, the only thing that can get in your way is if your gi isn’t of the right quality. If it tears up, you can say goodbye to the choke.
Use your left elbow and bring it down right next to your opponent’s head, perpendicular to it.
Your opponent’s face is now under and behind your armpits, hiding your window of opportunity to get your Gi out.
Now that you have your Gi in your right hand, leave it near your opponent’s neck, close enough for your left hand to grab it.
Since your left hand will be under and around your opponent’s neck, you will grab the gi and pull back your elbow.
This is where you now go towards the North South position and that’s why you should put your right hand next to your opponent’s hips to not allow them to follow you.
Slowly move towards their head until you’re in North-South, and to apply pressure, use your head as the base and set it down towards the right of your opponent’s hips.
The more you rotate towards the left, in the clockwise direction that you came in, the more the pressure is applied on your opponent’s neck.
Americana
The Americana is a staple to wrestling, MMA and BJJ. Since all this submission requires is your opponent’s hand and wrist caught in between your cross arms, it’s easy to apply from almost any position.
In side control, you can bait your opponent by faking movements in order to get their wrist in your left hand with a grip that allows your thumb to be on top with your fingers.
Your right hand should come from under your opponent’s bicep and should hold your left wrist tightly.
Now, all that you need to do is apply pressure on your left hand and the submission will become inevitably and excruciatingly painful.
How to Escape Side Control?
Let’s assume that you’ve found yourself in your opponent’s side control. Here’s what it would look like:
You’re on the mat with your opponent perpendicularly lying on you, putting pressure on your torso.
They have their right hand under your neck and forming a grip with their left hand that’s going under your shoulder.
The solution?
Firstly, to avoid giving your opponent the knee on belly, you need to make sure that you have a knee on your opponent’s waist on the left side at all times.
Secondly, resist the urge to try and lift your opponent up and throw them away.
Instead, use your flexibility and take your right knee and put it close to your hips and get ready to bridge.
Bridging with your hips and your back is much stronger and efficient than lifting with your arms.
Bridge Escape
The first escape is very basic and should be learned for the principle even if it ends up being countered very soon.
By planting your knee down on the ground, and your other knee either against your opponent or down on the ground as well, you can easily push yourself against your opponent and create space behind you.
(VARIATION POINT)
When you get your opponent up, slide your bottom shoulder behind until you break your opponent’s grip.
Now, push yourself back with your hands and try to get your knees in by turning and creating space between yourself and your opponent.
As you’re turning, make sure to get your neck free and lock your legs as soon as they’re gripping your opponent.
You can get a closed, half or even an open guard from this escape.
Reversal Escape
From the (VARIATION POINT), if you have an opponent who’s familiar with the Bridge escape, you will encounter extreme force from them trying to push you back down.
Anticipating this, you will instantly get back down and transfer the momentum and energy to the other side, i.e. if you’re pushing left for the bridge, your opponent will be applying force on the right.
When they apply that much force against you towards the right, you take the surplus force and bridge to the right with the momentum and take your opponent with you.
This will result in the positions being reversed and you taking the side control for yourself.
Back Attack / Takedown from Reversal Escape
If your opponent anticipates both of the escape strategies above, they’ll instantly try to use their free arm (the one that’s not under your neck) to support them from rolling over to the other side.
This arm will be the crucial opening you need to get an underhook on your opponent.
Once you have this underhook, you can use the opening to scramble to your knees which will get you to the backside of your opponent.
This is where your opponent will either let you take the back or try to stop you by blocking your face or head.
If you can take the back, you’ll have a rear mount which is great.
If you can’t, you’ll notice that by blocking your head, they’ve created enough space for you to take their knee on the other side for a textbook takedown.
There are many ways to attack the back when countering from side control variations such as Kesa Gatame or the North South.
A few of them involve having substantial flexibility in your body that gives you the potential to reach your opponent’s back with your legs.
Takeaway
Here’s an overview of what we’ve covered in the side control position:
Significance and Advantages of Side Control
From the Side Control position, you can get to:
- Kesa Gatame
- Reverse Kesa Gatame
- North South
- Knee on Belly (awards 2 points in some competitions)
Side Control Retention
You can retain the side control position by immobilizing your opponent by exerting pressure and incorporating structure in the right places.
Using flexibility is advantageous provided you prepare yourself and get the required elasticity in your body.
Side Control Attacks
Attacks from the side control position include:
- Kimura
- Lapel Choke
- Americana and many others
Side Control Escapes
Escaping the side control position by using these three escapes:
- Bridge Escape
- Reversal Escape
- Back Attack / Takedown from Reversal Escape
Make sure to work out in proper gi and rashguards to ensure hygiene and fine BJJ experience.


Leave a comment
This site is protected by hCaptcha and the hCaptcha Privacy Policy and Terms of Service apply.