
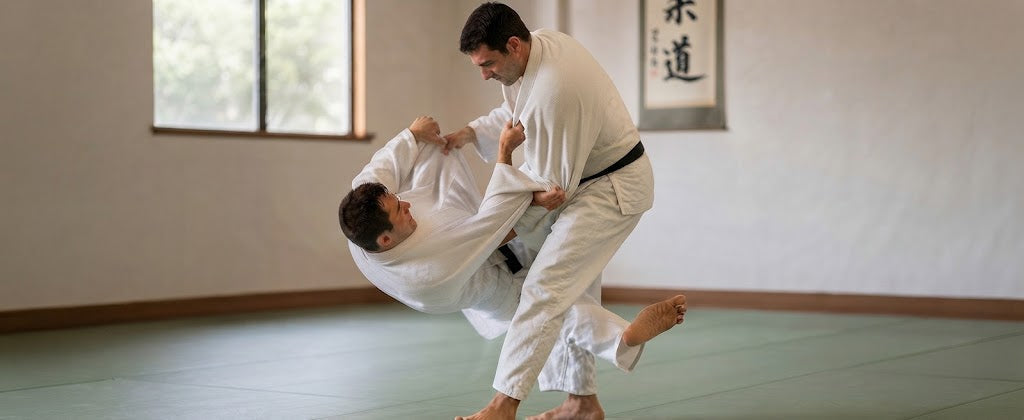
New to judo? Start with the six basic judo throws most beginners learn first. Get a step by step breakdown of each throw, the mistakes that make throws fail, and a safe way to progress from drilling to randori. Read the full guide and gear up for your first class.
Basic judo throws are the first techniques most beginners learn to move a partner, break balance, and finish under control. The six most common are Ogoshi, Osoto gari, Ouchi gari, Deashi harai, Sasae tsurikomi ashi, and Seoi nage. All six belong to Dai ikkyo, the first group of the Gokyo, the traditional list of 40 judo throws. This guide gives you a step by step breakdown of each one, explains what it teaches, and shows you how to practice safely.
Learning judo throws is not about memorizing a long list. You need to understand how to move a partner, create an opening, enter at the right distance, stay balanced, and finish with control. That is why the same few throws appear in nearly every beginner class.
Table of contents
1. The Six Basic Judo Throws at a Glance
Instructors choose their own teaching order, but these six simple judo throws cover the main movements a beginner needs.
- Ogoshi (major hip throw): teaches hip position and body connection.
- Osoto gari (major outer reap): teaches balance breaking and attacking the outside of the base.
- Ouchi gari (major inner reap): teaches inside attacks and movement against the stance.
- Deashi harai (advancing foot sweep): teaches timing and footwork.
- Sasae tsurikomi ashi (propping drawing ankle throw): teaches blocking, redirection, and hand and foot coordination.
- Seoi nage (shoulder throw): teaches turning entries and forward rotation.
Treat these as six lessons in how judo works, not six separate tricks. The skill each throw teaches matters more than the throw itself.
2. What Makes a Judo Throw Basic?
A basic judo throw is not always an easy throw. Some techniques are simple to understand but hard to land on a resisting partner. Others take more coordination but teach a movement you will use in many situations.
A throw earns its place in beginner training when it develops a foundational skill such as:
- Controlling distance.
- Keeping your posture and balance.
- Moving a partner before you attack.
- Creating kuzushi, which means breaking balance.
- Entering at the correct angle.
- Coordinating your hands and feet.
- Using body position instead of raw strength.
- Recognizing an opening and linking one attack to another.
Your body proportions, past experience, training partners, and dojo can all change which throw feels natural first. No single throw is mandatory. The goal is a useful foundation.
3. Before You Throw: Ukemi, Grips, and Safety
Learn ukemi first. Ukemi is the skill of falling and receiving throws safely, and it makes every repetition possible. When both partners trust their falls, they can train with more control and less fear. Good instructors teach it before any throw practice, on proper mats.
Next, learn the basic grip. Most beginner throws start with one hand on your partner's sleeve and the other on their lapel or collar. A grip should help you control your partner's posture and movement. It should do more than hold cloth.
Finally, remember that throwing is a physical skill you learn with a partner and an instructor. Do not practice throws on an untrained person, a hard floor, or any improvised surface.

4. The Three Parts of Every Judo Throw
Judo teachers break every throw into three parts:
- Kuzushi: breaking or disrupting your partner's balance.
- Tsukuri: the fitting in or preparation phase that places both bodies in position.
- Kake: the execution of the throwing action.
These terms work best as a diagnostic tool. When a throw fails, do not just say it did not work. Ask three questions. Did I disrupt their balance? Did my body reach the right position? Was the finish correct? The first "no" tells you where to work.


5. Step by Step Judo Throws
The breakdowns below assume a right handed attacker against a right handed partner, with your left hand on the sleeve and your right hand on the lapel unless noted. Reverse everything for left handed practice, and train both sides. Your instructor may teach slightly different grips, angles, or timing, so treat these steps as a study guide and follow your coach in class.
5.1. Ogoshi: Major Hip Throw
Ogoshi shows you how your position controls your partner's position. You bring your hips into contact, control their upper body, and rotate them over your hip. You do not lift them.
Step by step:
- Take a sleeve grip with your left hand and wrap your right arm around your partner's back at the waist or belt line.
- Pull with the sleeve hand to bring your partner forward onto their toes.
- Step your right foot in front of their right foot and pivot, then bring your left foot back so your back faces them and your feet sit inside theirs.
- Bend your knees, pull their body tight against your back, and keep your hips lower than theirs.
- Straighten your legs, turn your head toward the direction of the throw, and pull the sleeve down so they roll over your hip.
- Keep hold of the sleeve and finish with control.
Common mistake: leaving a gap between the two bodies and trying to lift. That turns the throw into a strength exercise. Fix your entry, distance, and posture before you add effort.
5.2. Osoto Gari: Major Outer Reap
Osoto gari teaches you to attack a partner's base instead of lifting them. Your hands and body disrupt their balance, and your leg removes the support.
Step by step:
- Grip the sleeve and lapel.
- Move your partner so their weight shifts onto their right leg, then use your lapel hand to push their upper body toward their back right corner while your sleeve hand pulls.
- Place your left foot beside their right foot, close enough that your attacking leg can swing through.
- Swing your right leg forward, then back, and reap their right leg from behind while you keep your chest close to theirs.
- Drive your upper body forward and down so your partner falls straight back.
- Keep your sleeve hand pulling as they land.
Common mistake: reaching too far with the leg while your upper body drifts away. You end up stretched out and off balance. Control the upper body first.
5.3. Ouchi Gari: Major Inner Reap
Ouchi gari gives you an inside attack. It teaches you to move around the stance and shows how one attack can change how your partner reacts.
Step by step:
- Grip the sleeve and lapel.
- Step in close with your left foot, bringing your body near theirs and pressing their weight onto their left leg.
- Place your right leg between their feet and hook it around the inside of their left leg.
- Reap that leg toward their back corner while your hands drive their upper body the same way.
- Follow them down under control.
Common mistake: attacking the leg without moving the upper body. The leg then does all the work, and your partner can resist easily.
5.4. Deashi Harai: Advancing Foot Sweep
Deashi harai teaches the most important concept in this list: timing can matter more than force. You sweep a foot at the moment it moves and lands, not while it sits planted.
Step by step:
- Grip the sleeve and lapel and move with your partner as they step.
- Watch for the advancing foot as it lands but before their weight settles.
- Sweep that foot with the sole of your foot, keeping your foot low and sliding across the mat instead of kicking up.
- Turn your hands as if turning a steering wheel so their upper body follows the foot.
- Step your support foot back to make room, and keep your own posture upright.
Common mistake: sweeping late. A late sweep becomes a kick or a shove. Practice recognizing the moment first.
5.5. Sasae Tsurikomi Ashi: Propping Drawing Ankle Throw
This throw shows that your leg does not always need to sweep or reap. Sometimes your foot blocks while your hands and body turn your partner around that block.
Step by step:
- Grip the sleeve and lapel and draw your partner forward onto their toes as they step.
- Turn your upper body so your partner's weight moves toward their front corner.
- Place the sole of your foot against the front of their ankle, as a block and not a sweep.
- Lift and turn with your hands so they rotate forward around that ankle.
- Finish with control and keep hold of the sleeve.
Common mistake: blocking the foot without moving the upper body. The foot then becomes a simple obstacle. Your hands, body, and blocking foot must work together.
5.6. Seoi Nage: Shoulder Throw
Seoi nage introduces turning into your partner and using a close entry to throw them forward. There are several variations, and many dojos teach the two handed version, called morote seoi nage, before the one handed version, called ippon seoi nage. Learn the exact mechanics from a qualified instructor.
Step by step:
- Take a sleeve and lapel grip.
- Break your partner's balance forward by pulling the sleeve up and in as you step.
- Turn in on the balls of your feet so your back faces them, with your feet inside theirs and your knees bent.
- Place your right arm under their right armpit and load their weight onto your back, keeping your hips lower than theirs.
- Straighten your legs, bend forward, and pull the sleeve down across your body so they roll over your shoulder.
- Keep hold of the sleeve and guide them down.
Common mistake: turning without reaching a useful position. If you finish the turn and your partner is still standing comfortably behind you, the problem began in the entry.
6. Easy Judo Throws: Which Ones Feel Simplest?
No judo throw is easy for everyone. A technique that feels natural to one beginner can feel awkward to another, depending on height, proportions, mobility, past grappling experience, and partner.
Even so, some simple judo throws are easier to understand on day one:
- Osoto gari: one clear idea, which is to take the base away from a balanced partner.
- Deashi harai: the movement is small, though the timing takes practice.
- Ouchi gari: a short inside action that teaches how legs and hands work together.
The hip and shoulder throws, Ogoshi and Seoi nage, ask for a deeper turn and a closer entry. Many beginners find them harder to land on a resisting partner, even when the steps look simple on paper.
A better question than "which throw is easiest?" is "which throw gives me a useful movement to work on right now?" Your instructor can answer that because they can watch you move.
7. Why Your Judo Throws Keep Failing
If you know the steps but the throw will not work, do not assume you need more strength. Work backward through the technique and find the first thing that went wrong.
- Distance: Are you too far away, or too close to enter?
- Balance: Is your partner actually being moved? If they stay comfortably balanced, you attacked too early.
- Posture: Are you keeping your own balance? A throw gets hard when you sacrifice your position to create movement.
- Grip: Do your grips help control posture and direction, or do they only hold cloth?
- Entry: Did you reach the right position before you tried to finish? A strong finish rarely rescues a poor entry.
- Timing: Did you attack while your partner was moving in a useful direction?
- Direction: Does the direction you push or pull match the throw?
- Finish: Check this last, after the other seven.
Strength helps in judo, but it can also hide technical problems. A stronger athlete can force a poor throw on a weaker partner. The problems show up quickly against a partner who is stronger, more experienced, or less cooperative.
8. How to Practice Judo Throws as a Beginner
Do not jump from a demonstration straight to hard randori. Build up in stages.
- Learn ukemi. Learn to fall and receive throws safely under instruction.
- Learn the basic movement slowly. Focus on posture, foot placement, grips, entry, and direction. Accuracy matters more than speed.
- Repeat the entry. This drill is called uchikomi. Practice stepping into position without finishing the throw. Check that you reach the right spot without losing your balance.
- Add movement. Enter while your partner walks, changes direction, or reacts to you.
- Add light resistance. Now you must recognize the opening yourself.
- Use the throw in randori. Your partner can change grips, resist, move away, and attack you. This is where technique turns into usable judo.
Pick one problem at a time. If your entry is too far away, fix distance. If your balance breaks during the entry, work on posture and foot placement. Fixing five things at once makes it hard to see what actually improved.

9. Why a Throw Works in Drilling but Not in Randori
This is normal. In drilling, your partner helps create a predictable situation. In randori, they do not. You have to create openings through movement, grips, timing, and reactions.
Do not abandon the throw. Learn the situations where it becomes available. The progression stays the same: learn the movement, repeat it, add movement, add resistance, then look for it in randori.
10. Judo Gear for Your First Classes
You do not need much to start, but the right kit makes practice safer and more comfortable. A judo gi gives you a jacket built for the gripping and throwing demands of judo, and some clubs require one from your first class. Ask your instructor about their uniform rules before you buy. You can also browse judo training accessories for the extras that help between classes.

11. Judo Throws and BJJ
Many BJJ students learn judo throws to improve their standing game. If you train both arts, read about the differences between a judo gi and a BJJ gi before you decide what to wear. You can also explore judo techniques that fit into BJJ, or see how judo and BJJ compare if you are deciding where to start.
12. What to Learn After the Basics
Once the foundational movements feel comfortable, your learning should widen instead of becoming a longer list of names. Typical next steps include:
- More variations of throws you already know.
- Combinations, where one attack creates an opening for another.
- Counters.
- Gripping strategy.
- Movement patterns and transitions between standing and ground work.
- More realistic resistance.
You begin to understand why a technique becomes available, not just how to perform its steps. For a broader reference, see the complete list of judo throw names and how they are grouped.
13. Frequently Asked Questions
What are the basic judo throws for beginners?
The most common basic judo throws are Ogoshi, Osoto gari, Ouchi gari, Deashi harai, Sasae tsurikomi ashi, and Seoi nage. All six sit in Dai ikkyo, the first group of the Gokyo. Your instructor decides the exact selection and teaching order.
What is the most basic judo throw?
No single throw is the most basic for everyone. Osoto gari and Deashi harai are among the most common first throws because each teaches one clear idea, balance breaking or timing. Some dojos begin with a hip throw such as Ogoshi or Ukigoshi.
How do you do a judo throw step by step?
Every throw follows the same pattern. Take your grips, break your partner's balance (kuzushi), step into position (tsukuri), then finish the throw under control (kake). The detailed step by step sections above show how this pattern changes for each of the six throws.
What is the easiest judo throw to learn?
No throw is easiest for everyone. Osoto gari, Deashi harai, and Ouchi gari are often simpler to understand at first. Height, proportions, partner, and past experience all change how difficult a throw feels.
What judo throw should a beginner learn first?
There is no single correct first throw. Instructors usually pick one that teaches a foundational skill such as balance breaking, entry, footwork, or control. Ask your coach which fits your current level.
Do I need to learn ukemi before judo throws?
Yes. Ukemi is a core part of safe judo training. It lets both partners practice with more control and confidence, and instructors teach it before throw practice.
Why do my judo throws work in practice but not in randori?
Drilling gives you a predictable situation, and randori does not. Your partner can change grips, distance, posture, and resistance. Learn to recognize the movements and reactions that make your throw available.
Why can't I throw my partner even though I know the steps?
The problem usually starts before the finish. Check distance, posture, grip, balance breaking, entry, timing, and direction. Find the first step that failed and fix that one before you add force.
How many judo throws should a beginner learn?
There is no fixed number. A small group of foundational throws with good movement, balance, and timing is more useful than many throws learned superficially.
Can I learn judo throws at home?
You can study terms, review demonstrations, and mentally rehearse what you learned in class. Throwing is a physical skill, so learn it with a qualified instructor, a partner, and proper mats.
14. Final Thoughts
Basic judo throws are not about collecting techniques. They teach the language of judo: movement, balance, timing, positioning, entry, control, and reaction. Ogoshi teaches hip position. Osoto gari teaches you to attack the base. Ouchi gari introduces inside attacks. Deashi harai shows why timing matters. Sasae tsurikomi ashi teaches redirection. Seoi nage develops turning and close entries.
The lesson underneath all six is the same. A throw rarely begins with the final movement. It begins with how you move, how your partner responds, where their balance goes, and whether you can reach the right position without losing yours. Once you see throws that way, judo becomes less about memorizing steps and more about understanding opportunities.




Leave a comment
This site is protected by hCaptcha and the hCaptcha Privacy Policy and Terms of Service apply.